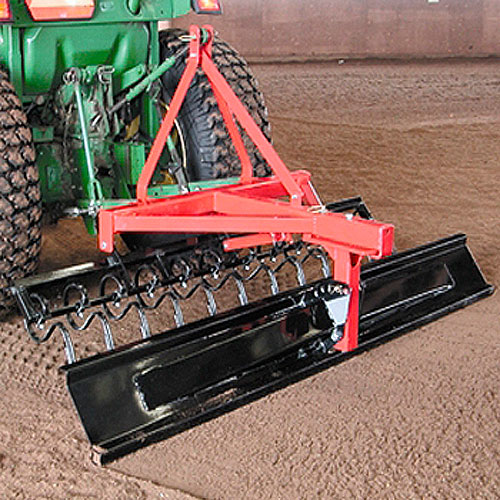
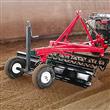
8' Track & Ring Conditioner, Powder-Coated Red

SKU: DRAG8
Blade, angle, pitch, s-tines are all adjustable to allow for conditioning arenas based on specific horse disciplines and abilities. The compact, lightweight design makes them easier to pull than other models!


- Item Description
- Specifications
- Manuals
- Video
- Reviews
The 8' track and ring conditioner cuts your maintenance time in half while providing you with consistent footing every time! Adjust the pitch and angle of the blade while it stays level and floats along the surface.
- One-pass operation
- Easy to maneuver in tight corners
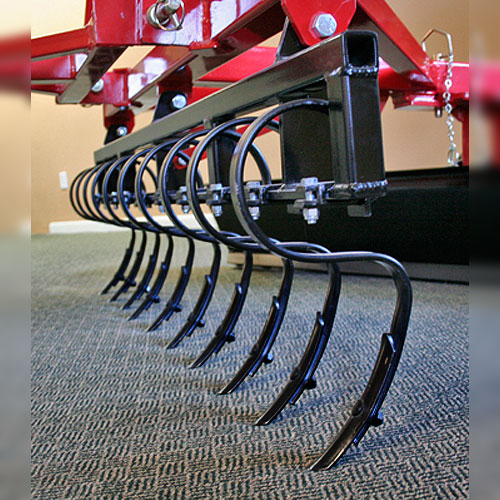
- 6 depth-adjustable double-ended tines for twice the usage and easy to replace
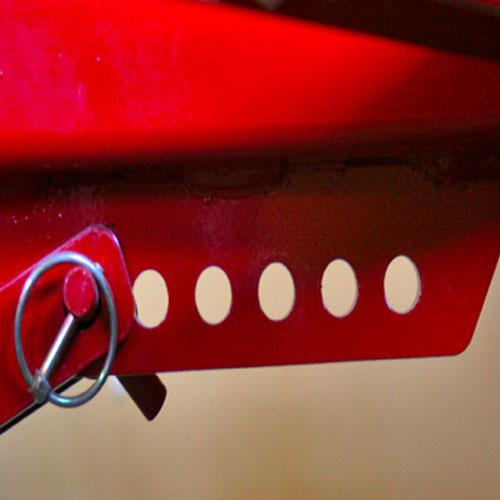
- Adjustable blade - both pitch and angle, the blade stays at a level plain and floats on footing material keeping the tines at a consistent dept
- 3-point hitch mount and A-frame design for strength and durability
- Great for large or small tracks, rings, courses, courts, and arenas
- Moves enough material to fill in holes and take out high posts in arenas
Installation: This track and ring pull-behind conditioner kit is crated and boxed when shipped. Easy-to-follow instructions and a complete hardware package allow anyone to assemble it in less than an hour with just a few wrenches! See operation instructions on the last page for the proper use of your track and ring conditioner.
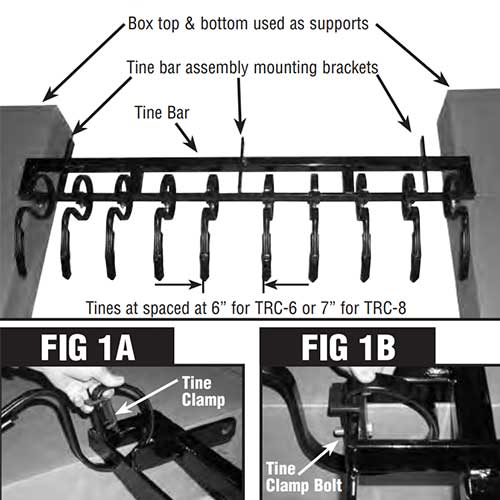
- Step 1 - Installing Tine On Tine Bar (*This finished section will be called "tine bar assembly".)
1. Place tine bar between two supports as shown in STEP 1 photo (we used the top and bottom of the shipping boxes anything that will give you at least 8” clearance will do).
2. Place the first tine on the tine bar as shown in FIG 1A & FIG 1B. Attach and tighten using 3/8” x 1-1/2” bolts and lock nuts. Repeat the process until all tines are in place.
*Note: Tines should be spaced approximately 6” apart on-center for the TRC-6 and 7” for a TRC-8. - Step 2 - Attaching the Blade Post and Blade to the A-Frame
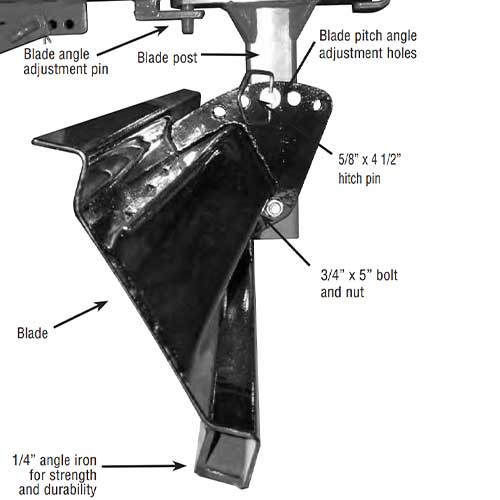
1. Position the blade post in the guides on the rear of the A-frame with blade angle adjustment holes facing towards the front of the A-frame as shown FIG 2A.
2. Using a 3/4” x 4-1/2” bolt put the flat washer on the bolt and put the bolt through the A-frame hole sliding into the top of the center blade post hole. Tighten using 1-1/8” wrench or ratchet & socket.
*Note: There is a nut that is welded on to the bottom side of the blade post plate. Make sure that the front hitch pin is in front hole so the blade post does not turn.
3. Tighten the bolt and nut completely and then back off 1/4 turn to allow for movement of the blade post.
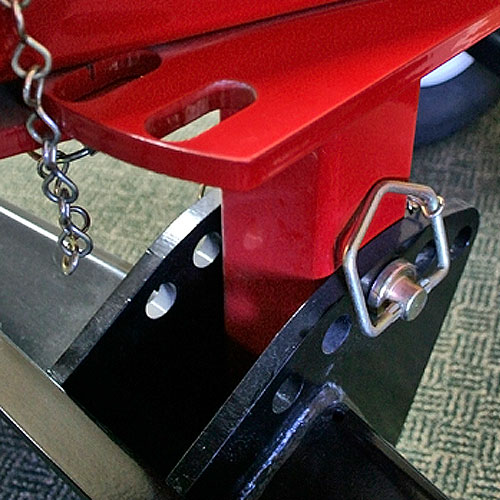
4. Then drop in the 3/4” drop pin through the A-frame into a blade post adjustment hole. Next position the blade face down and lift the blade post and A-frame placing it into the slot on the back of the blade, and attach using the 3/4” x 5” bolt and lock nut FIG 2B. Again tighten completely and back off 1/4 turn to allow for movement.
*Note: Leave blade assembly unfinished at this time this will make the unit more stable for the rest of the assembly. - Step 3 - Attaching the 3-Point Hitch
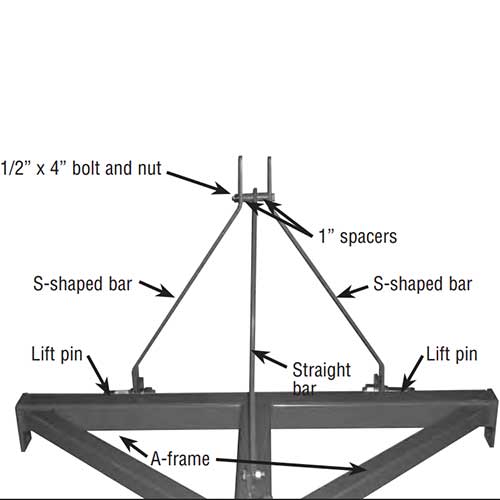
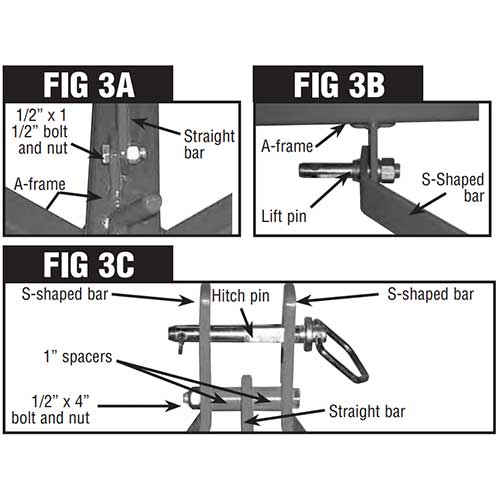
1. First, fasten the straight bar to the A-frame with a 1/2"x 1-1/2" bolt & lock nut FIG 3A.
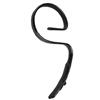
2. Then locate and fasten the two S-shape hitch bars to the A-frame with the lift pins as shown FIG 3B.
3. Now take the unfastened ends of the S-shaped bar and straight bar and using the 1/2” X 4” bolt & nut with the 1" spacers on either side of the straight bar join the 3 ends as shown in FIG 3C.
4. Tighten these bolts now before proceeding.
5. Then install the hitch pin and fasten with the cotter pin.
*Note: There will be approximately 1/4” of play around the hitch pin this is normal. - Step 4 - Attaching the Tine Bar Assembly to the A-Frame
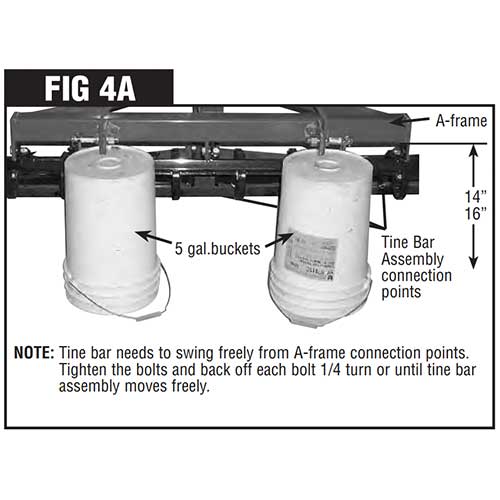
1. Support the front of the A-frame at an approximate height of 14” to 16” (we used two 5 gallon buckets) to place the buckets or whatever you choose under the 3 point hitch brackets at the front of the A-frame FIG 4A.
*Note: Keep supports clear of A-frame. It's important to make sure the A-frame is supported securely.
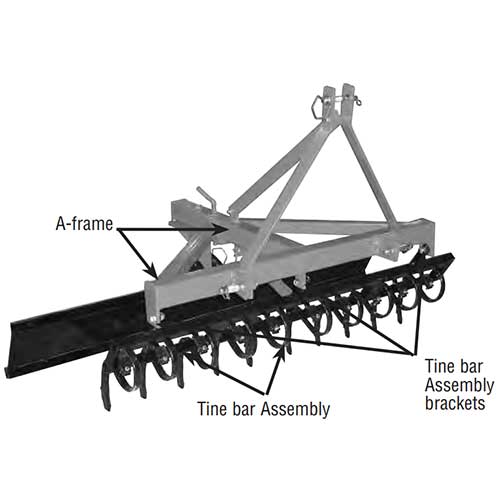
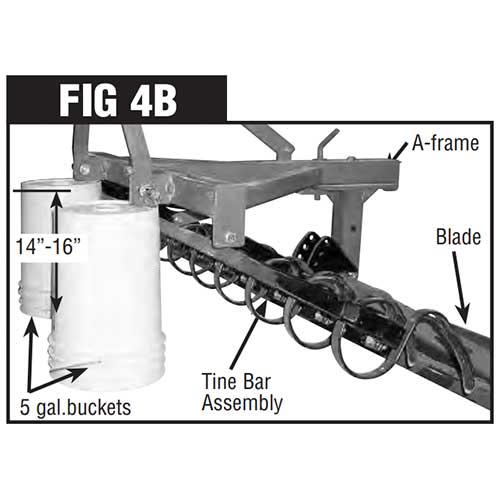
2. Now slide the tine bar assembly into position under the A-frame with the tines pointing down and towards the blade at the back FIG 4B.
3. With help attach the tine bar assembly with the 5/8” x 2” bolts & lock nuts to the 3 mounting brackets on the underside of the A-frame.
4. Tighten the bolts and back off 1/4 turn to allow tine bar assembly to move freely. - Step 5 - Attaching the Tine Height Adjustment Bar
1. Locate the tine height adjustment bar and fasten to the center support of the tine bar assembly using the 1/2” x 1-1/2” bolt & lock nut STEP 5 photo.
2. Lift and attach the other end to the center hole of the tine height adjustment bracket attached to the underside of the A-frame using one of the 5/8” x 4-1/2” hitch pins and secure in place with the cotter pin. - Step 6 - Finalizing Blade Position
1. Lift the blade from either side until the center blade pitch angle adjustment hole is lined up with the hole in the blade post. Then secure in position with the remaining 5/8” x 4-1/2” hitch pin. - Step 7 - Attaching the Track and Ring Conditioner Using the 3-Point Hitch Assembly / Attaching to the Tractor
1. Backup your tractor with a 3 point hitch to the track conditioner. Make sure the area is clear of people and animals.
2. Position the tractor so the lift arms line up with the lift pins on the conditioner.
3. Slide the lift arms over the lift pins and put on the clip pins.
4. Attach the top link supplied with your tractor to top of the three-point hitch with the hitch pin supplied.
5. Adjust to the top link until the A-frame of the conditioner is level.
Shipping: This item ships on a semi-truck via an LTL freight carrier. It comes disassembled for economical shipping costs. Please contact one of our expert account managers at 800-434-6296 for a shipping quote. For more information on how this type of delivery works and what we need you to do upon arrival, please read through these two links:
-
- "We have been using this & for over 10 years now. I would not own any other on the market. with the exception of purchasing tines every now and again, it has paid for itself countless times. Being a boarding facility with horses in and out of areas daily- inside and outdoor- we probably put more "miles" on ours than most people. One of the best investments we ever made!" - "The track and ring conditioner is a perfect drag for just about anyone. It's very easy to hook up and it does an awesome job. The best part is, is that it was half the cost of others on the market!"
-

Track & Ring Pull-Behind Wheel Kit, Powder-Coated Red
-
6' Track & Ring Conditioner, Powder-Coated Red
-
4' Track & Ring Conditioner, Powder-Coated Red
-
8' Track & Ring Pull-Behind Conditioner, Powder-Coated Red
-
6' Track & Ring Pull-Behind Conditioner, Powder-Coated Red
-
4' Track & Ring Pull-Behind Conditioner, Powder-Coated Red
-
Track & Ring Tine Assembly with 6.5" Double-Ended Tine Point Tooth
-
Track & Ring 7.5" Double-Ended Tine Point Tooth
-
Track & Ring 6.5" Double-Ended Tine Point Tooth
-
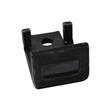
Track & Ring Tine Bracket
-
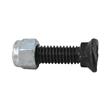
Track & Ring Tine Nut and Bolt
-

Moisture Lok Dust Control