Flex Fence End Tightener Kit

SKU: ET*
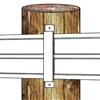
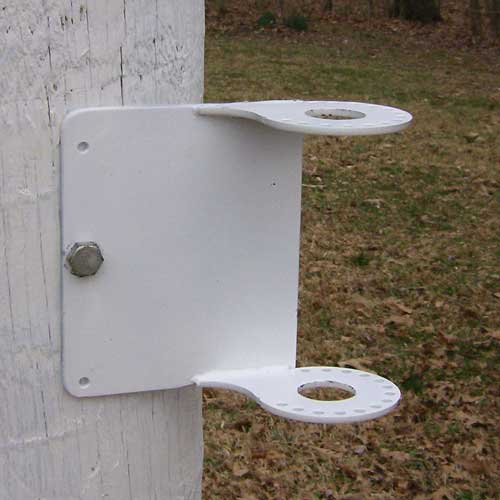
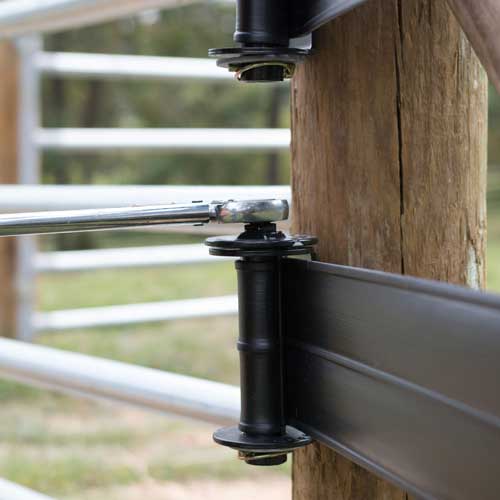
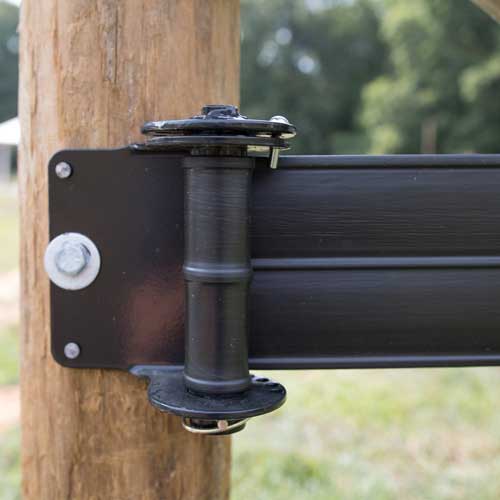
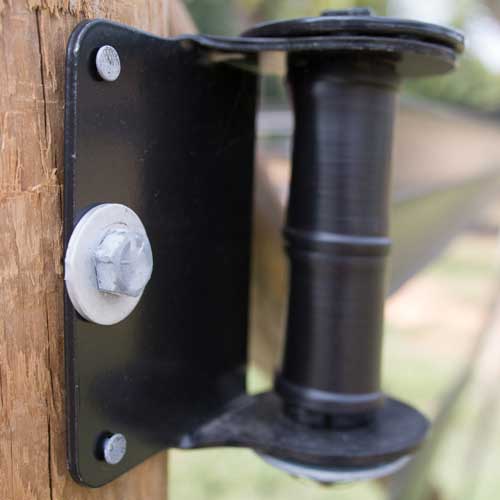
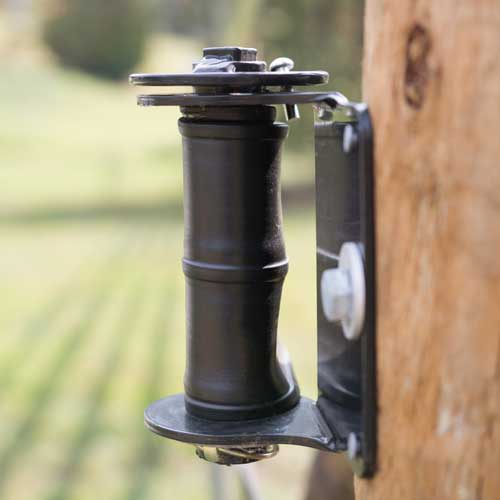
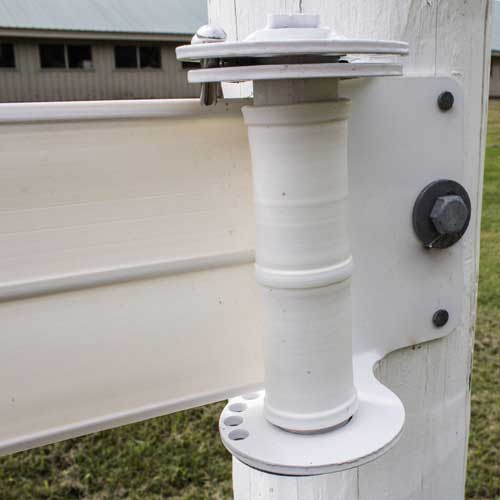
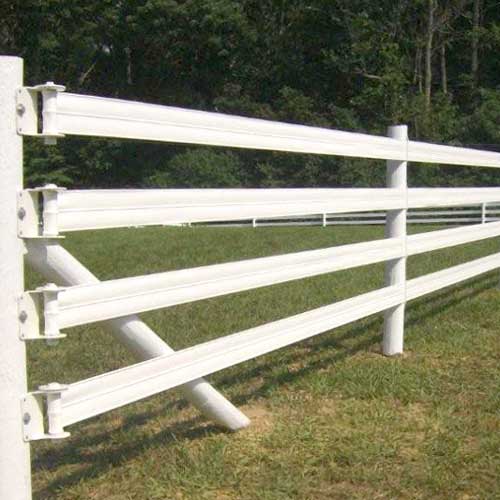
The Flex Fence end tightener kit is used to start your fence run and it tensions your Flex Fence rail. End tighteners are very adaptable and can be installed with the Flex Fence rail coming from the right or left of the end post.
Compatibility: Flex Fence
Posts Compatibility: Wood


- Item Description
- Specifications
- Manuals
- Video
- Reviews
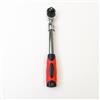
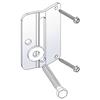
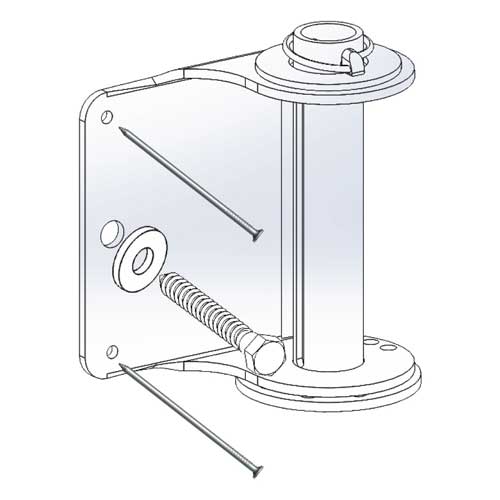
The Flex Fence end tightener kit is used to start your fence run and [using a ratchet handle] it tensions your Flex Fence rail. End tighteners are very adaptable and can be installed with the Flex Fence rail coming from the right or left of the end post. Simply remove the linchpin and washer from the drop tube, pull the tube out of the tightener's body, flip it over, and then put the washer and linchpin back in place. The smooth, simple design allows them to work efficiently while providing the safety your horses need!
How to Start & Tension a Flex Fence Rail – End Tightener Kit Installation
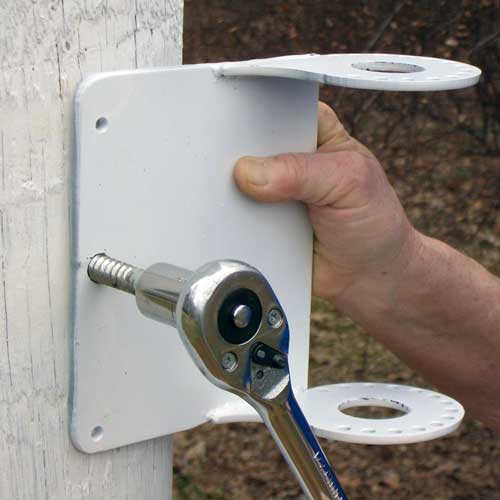
- Mark and drill a pilot hole in the end post to a depth of approximately 4" using a 3/8" diameter bit for each tightener. The location for end tighteners should be in the center of the post. (*Do not measure back 2" as you do for end plate kits.)
- Put the lag bolt through the end tightener and into your predrilled hole. (*If you are pulling the Flex Fence rail from the right of the end post - use the end tightener as it arrives. If you are pulling the Flex Fence from the left of your end post - remove the linchpin and washer from the drop tube and then pull this tube out of the tightener body and flip it over. Put the washer back in place and also the linchpin.)
- Snug up the lag bolt on the end tightener; it is now ready to accept the Flex Fence rail.
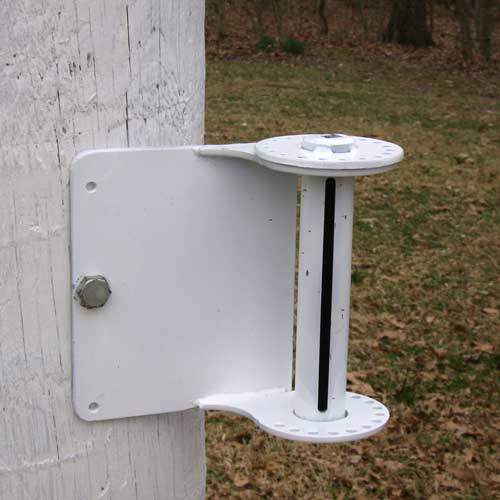
- Pull all the slack out toward the end tightener, measure 3" past the slot in the drop tube, mark the fence, and then cut off the excess Flex Fence.
- Insert the Flex Fence rail into the end tightener's slot. Put your 1/2" drive ratchet in the square opening of the drop tube.
- While applying finger pressure, tighten the Flex Fence rail with a ratchet handle. (*If you are on the right side turn it counterclockwise. If your end tightener is installed to the left of the end post, turn your ratchet clockwise. This will keep the rail closest to the post.)
- To get another “bite” with your ratchet, you will have to put a rivet in a lined-up hole while you are tensioning the Flex Fence rail. This is due to the spring-back action created when spooling.
- Continue to ratchet until the slack is removed but do not tighten the fence yet.
- Go back to your other end plate post to ensure it's lined up with your Flex Fence run; you have applied a minimum force with your tightener. Stand back, look it over, and make sure the flow from end-to-end is to your satisfaction – you can even grab another set of eyes for a second opinion.
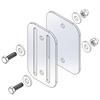
- After you have determined the end plate is in line with your fence run, install the two remaining smaller screws (a pilot hole should not be necessary). These screws are designed to trap the bent short section of the Flex Fence between the end plate and the post. (*If the screws become stripped, you can use two 3.5" ring shank nails.)
- Tighten the two screws and lag bolt.
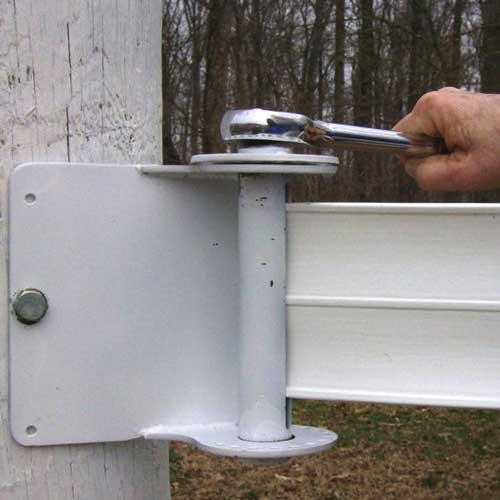
- Now that you have installed your end plates you are ready to completely tighten your Flex Fence rail. Your fence will have to be worked around the corners through your brackets to achieve uniform tension throughout the entire length. With the aid of a long ratchet handle for boosted torque, tighten your Flex Fence. (*If you have pulled about 2' of Flex Fence rail into your end tightener and it appears wavy at the other end, do the following: 1.) Start with removing the rivet and pulling the Flex Fence rail out of the drop tube. 2.) Again, pull the rail back about 3" past the slot in the drop tube and cut off the excess Flex Fence rail. 3.) Put the Flex Fence rail back in the slot and re-tighten.)
- Once you have tightened the Flex Fence, insert the two rivets into any two of the lined-up holes and tighten the lag bolt.
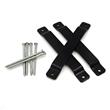
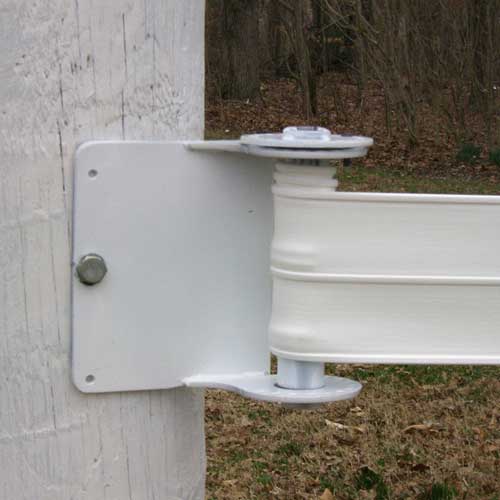
- Hammer both nails (at a different angle from the lag bolt) through the end tightener's holes into the post.
- Your end tightener kit installation is complete!
Do You Have Abrupt Changes in Ground Levels? If your grade changes abruptly on your proposed fence lines you can do the following (please reference page 18 in the installation instructions):
- At the change in grade, auger a 12” diameter hole 36” deep or below your frost line.
- Bell out the bottom of the holes to 18”.
- Put a 6” minimum diameter post in the hole.
- Add concrete until the hole is filled within 4” of ground level.
- Mark the post with the same spacing used to locate your end tighteners and end plates.
- Drill a 3/8" diameter pilot hole at each mark approximately 4" deep.
- Match two end tighteners' lag bolt holes together and screw the lag bolt into the pilot hole.
- Make sure all the slack is pulled out in both directions and follow the tightening procedure as shown on pages 20-23 in the installation instructions.
- Do this on both end tighteners. Try to have the same tension on each side when you are finished tightening.
Flex Fence End Tightener Compatibility:
- 4" End Tightener = Per4mance Flex Fence & 425 Flex Fence
- 5" End Tightener = 525 Plus Flex Fence
-
- "As far as I’m concerned they are the best tighteners on the market, easy to use, heavily built and the ability to mount them on an end or corner post is great because it keeps them out of sight. We build a lot of horse fence but not much vinyl, but since I’ve found this style tightener I’ll never use another style again." - Jason, PA - "I would give these 10 stars if I could! Easy to use look great and efficient." - "They are great! We love your fencing products!" - Jenifer, MN - "We really love the new end tighteners sooooo much easier than fighting with buckles." - Linda, FL - "I can do this one myself, instead of waiting for my husband to help me!"