
Flex Fence Splice Plate Kit
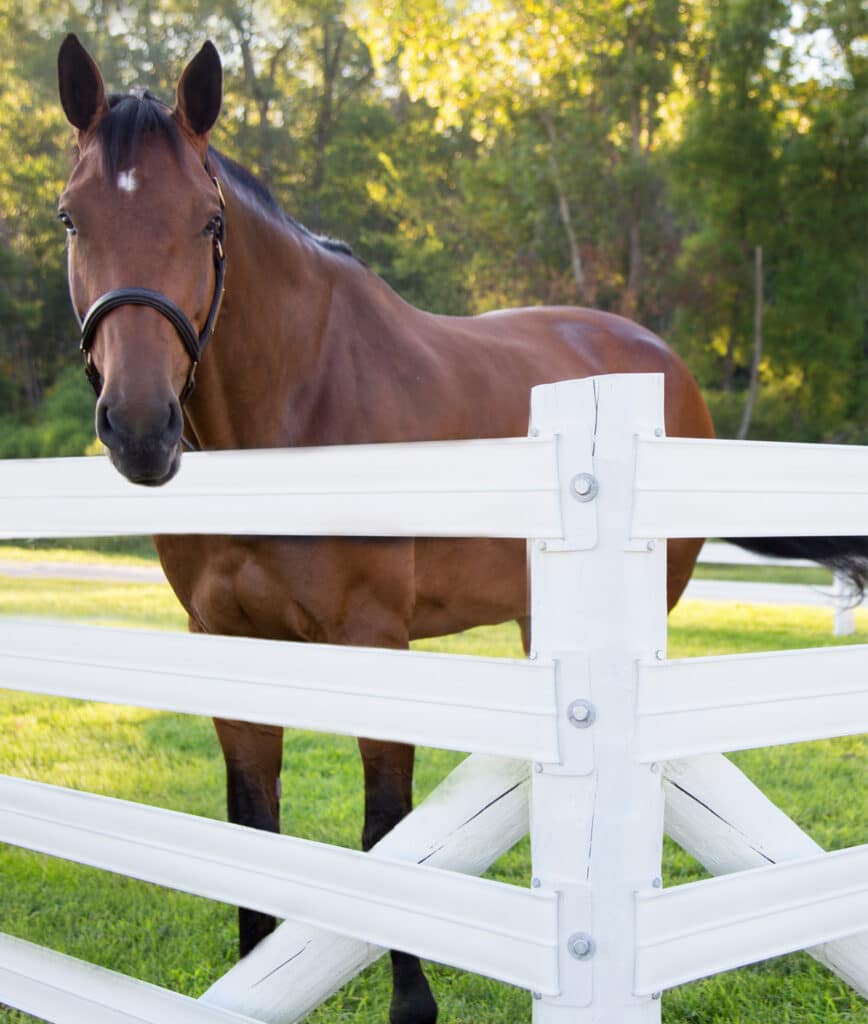
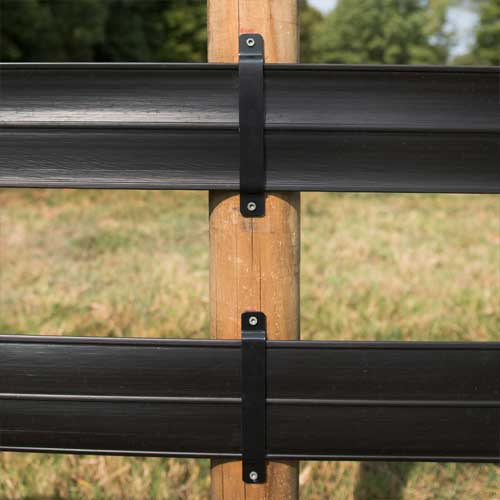
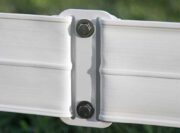
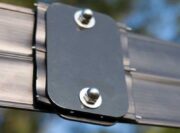
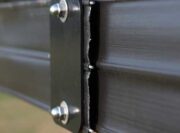
Combine two rails of Flex Fence with a splice plate kit. It holds each end of the fence securely and installs in just minutes. The powder-coated finish matches any color of Flex Fence so they disappear into the rail.
Compatibility: Flex Fence
Your Price: Price range: $18.86 through $19.90
[yith_wcwl_add_to_wishlist]
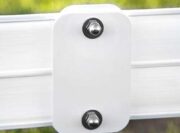
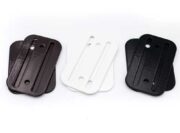
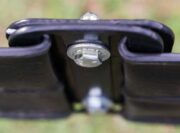
Combine two rails of Flex Fence with a splice plate kit. This one-of-a-kind splice plate holds each end of the fence securely and tightly without fear of slipping out and installs in just minutes. Constructed from heavy-duty galvanized steel, it’s then powder-coated white, black, or brown to ensure a long-lasting beautiful finish that matches the color of your Flex Fence so they disappear into the rail. All of the splice plate’s edges are rounded to ensure your horse will not be injured if it comes in contact with it.
Flex Fence Splice Plate Compatibility:
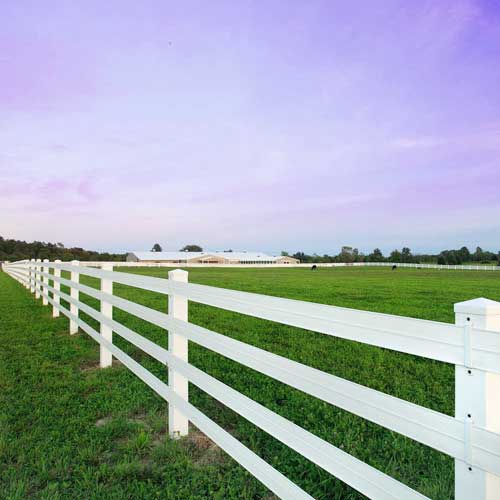
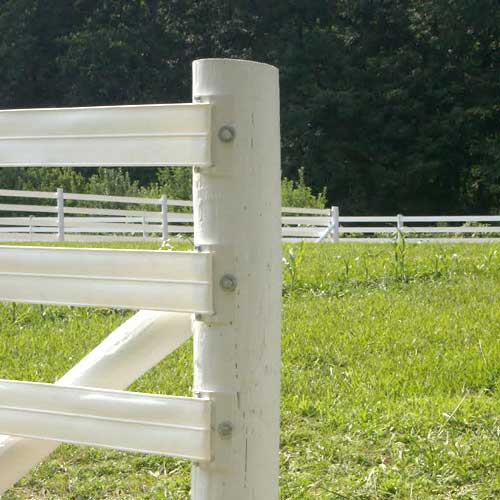
- 4″ Splice Plate Kits = Per4mance Flex Fence & 425 Flex Fence
- 5″ Splice Plate Kits = 525 Plus Flex Fence
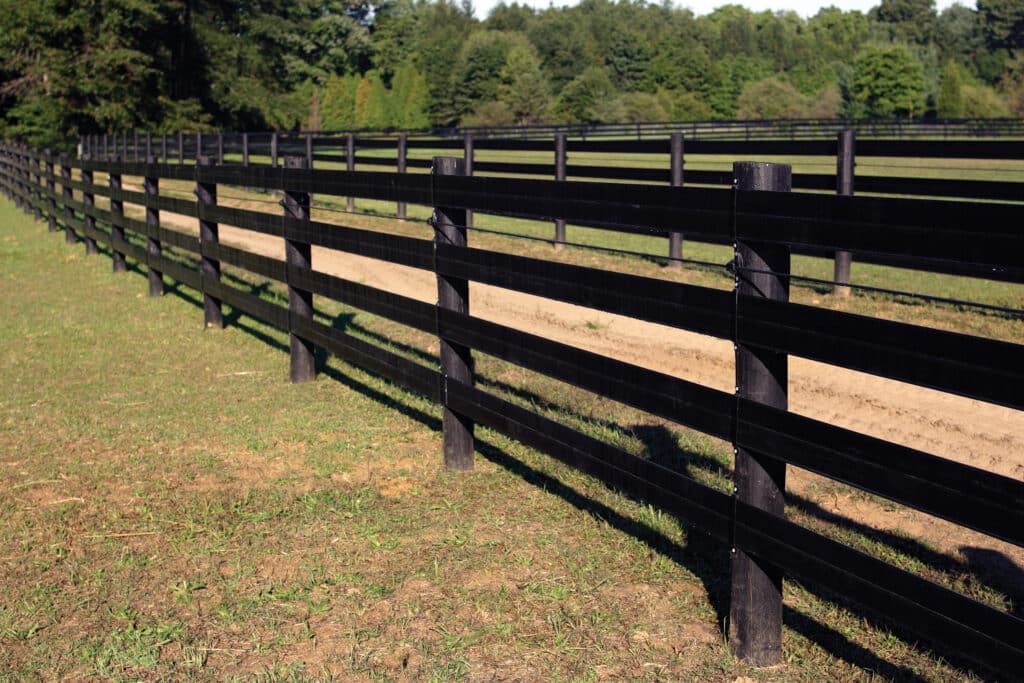
Colors: White, Black, or Brown
Finish: Powder-Coated
Material: Heavy-Duty Galvanized Steel
Sizes: 4″ or 5″
Fence Compatibility:
- 4″ = Per4mance Flex Fence & 425 Flex Fence
- 5″ = 525 Plus Flex Fence
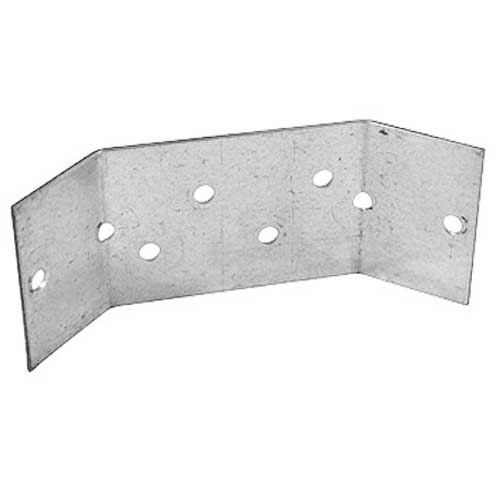
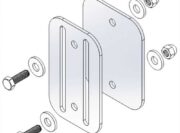
Kit Includes:
- 1 – Slotted Plate
- 1 – Backing Plate
- 2 – 1-1/2″ Zinc Bolts
- 2 – Acorn Nuts
- 4 – Zinc Washers
Tool Compatibility: High-Tensile Wire Cutters
Below are links to our Flex Fence installation instructions in PDF files, which you can save and print for future reference:
Flex Fence Installation Instructions
<!– Flex Fence Arena Sweeping Corners Installation Instructions –>
Flex Fence Round Pen Installation Instructions
How to Splice a Flex Fence Rail – Splice Plate Kit Installation
- Decide where you need to splice your fence. (Your splice should be between two posts and not directly next to either one, so the fence can be tightened afterward. *Note: You will want to face the splice plate outward so that rounded acorn nuts face outward away from your horses.)
- Take each end of the fence rail that is to be spliced, select one side and fold it over [outward from the horses], making sure the rail has a curved bend (not folded flat) and keeping sides parallel.
- Measure back 1″ and mark a spot on the fence rail.
- With the aid of a T-square, draw a line on the fence and cut the excess off at this mark. (You will need high-tensile wire cutters to cut through the wire.)
- If your fence rails are already in their brackets, make sure your bends are opposite each other. With that in mind – fold the other side over (keeping it parallel), measure back 1″ from the bend, and cut the excess off.
- Fit each end into the splice plate and bend the ends closed. (Make sure the fold is rounded and not pinched tight; do not hammer.)
- Put the bolts with the washers through the slotted plate. (The plate with the two fence rail openings.)
- Put the backing plate on using the supplied bolts, washers, and acorn nuts, then screw down until it’s finger-tight. (*Important: You must use a washer on the bolt side, then put the bolts through the plate. Put another washer on the bolts before you put the acorn nuts in place. You will use a total of 2 bolts, 4 washers, and 2 acorn nuts to put the full splice plate kit together.)
- Make sure your splice is to your liking and both sides are parallel, then tighten the acorn nuts onto the bolts with a ½” wrench and a 9/16″ ratchet or wrench.
- Your splice plate kit installation is complete!